We are doing it. The Gibsons are making the transition to "Real Food". What is real food? From what I have learned, in a nut-shell, real food is food that is closest to the way nature intended it to be. It is food that has not been altered by processing or preservatives. That means steering clear of most packaged food, white flour, white sugar, foods with tons of ingredients, and foods with ingredients you can't pronounce. It also means filling our diet with whole grains, fresh fruits and vegetables, good meats, and lots of homemade items.
Where did it all start? For those that know me, they know that I have always enjoyed eating healthy. I was raised eating a wide variety of foods, including fruits and vegetables. As I got older I became a little more conscious about what I was eating. I worked on minimizing fried foods and sweets, and increasing fruits, vegetables, and lean meats. However, even though I ate foods that had potential to be healthy, I still wasn't making the best choices. For example, I would eat a vegetable casserole that was full of cream of something soup. Salads under loads of ranch dressing. Flavored yogurt that was full of sugar. Crackers and bread that said "wheat" but were really just made with processed white "wheat" flour. Light butter "spread" that wasn't really even butter. Frozen "healthy" meals full of sodium. I could go on, but I'm sure you get the idea.
I also went through a phase where I was all about the low-fat, low-sugar, low-carb, low-whatever. The media told us that fat was bad, carbs were bad, sugar was bad, etc. I was never one to really "diet", but when I had a choice I would always choose the low-version of foods.. My fridge and pantry consisted of low fat dairy products, low fat dressings, and low sugar syrups, low carb tortillas, low fat crackers, low calorie cereals and so on. What I didn't know at the time was that those food items had been altered from their natural state. Yes, they had less carbs and fat, but in their place was ingredients that are mostly unpronounceable and not natural. The foods I was eating had lost most of their vital nutrients through these processes.
So how does all this bring me to my current stance on food? The past couple years I have become more and more interested in nutrition, and I have done quite a bit of reading and researching. The past few months I have really taken to this real food concept. The blog http://www.100daysofrealfood.com/ has been one of my favorite resources. It is full of information and great recipes for those wanting to eat a real food diet. In my time of learning, what I have found is this: you need carbs and fat and sugar and meat. All of these things can be very good for you if you know how to choose them and eat them in moderation. Carbs need to be 100% whole grain such as brown rice, whole wheat bread, and sprouted grains. Sugar needs to be from naturally occurring sources such as fruit, raw honey, and pure maple syrup. Fat needs to be from healthy fats such olive oil, nuts, fish, and REAL butter. Meats need to be preferably grass-fed, or at least organic. As far as packaged food goes, it needs to have very minimal *quality* ingredients.
So how are we transitioning to this way of life? Baby steps. My husband and I love food and some things are hard to give up, especially for him! Believe me-we love bread and desserts and pizza. But knowing how much healthier our bodies can be, helps us to embrace the changes. And one thing I love about eating this way is that I don't even worry about nutritional facts!Woohoo no more calorie counting! :D I just make sure I eat a variety of quality food and that's that. Notice I said variety. I would not be able to sit around eating grilled cheeses made with whole wheat bread, full fat cheese, and slathered with real butter all the time! Although that sounds delicious, we all know I would gain more than a few pounds! I'll say right now that we will probably never eat 100% real food ALL the time. I just feel that you have to live a little and certain occasions are worth the splurge. Right now I would say I am eating real food about 80% of the time, while my husband is probably at 60%. I would like to work our way to us both eating about 90% real food. But like I said-baby steps.
So what does my fridge and pantry look like now? I buy lots of fresh and frozen fruit and vegetables. I have a variety of raw nuts. I buy cereal that has very few ingredients and are whole grain. I have 100% whole wheat pasta, whole grain brown rice, quinoa, and oats on hand. I buy plain greek yogurt so I can add my own sweetness. I buy full fat cheese. I try to buy local farm fresh milk and free-range eggs when possible. I use pure maple syrup. I buy real butter from grass-fed cows. I have started making my own homemade whole wheat bread, rolls, and tortillas, but when I buy them I love the Ezekiel sprouted grains brand. I'm learning to make my own homemade spice mixes, dips, dressings, and chicken broth. Don't be fooled though. We still have some unhealthy food on our hands to work on venturing away from. As I sit writing this, my kitchen still contains Ritz crackers, chips, chocolate, graham crackers, canned soup, popsicles, ice cream cones, and more. And you know what? That's okay. It is a work-in-progress. We are doing much better than we use to and I feel great about that. And to be honest, I really don't crave those types of foods much anymore!
So what does this mean for the blog? You will notice that my blog is also going to be transitioning to the real food concept. Not every recipe will be real food, because some recipes are just too good not to share! Plus, everyone needs a splurge every now and then. ;) I am also planning on writing some more posts about real food tips and ideas for meal plans. I've had many friends ask me "So what do you eat? How do you pack your lunches for the week? What do you eat for breakfast?". So I am going to be answering these questions along with sharing my favorite go-to store-bought real food items. I hope you stick around!
Saturday, March 29, 2014
Monday, March 24, 2014
5 Minute Hummus

Who knew homemade hummus was so easy??? I just may never buy store-bought hummus again! The past few years, I have really become a huge hummus fan. Mostly I eat it with tortilla chips, but it's also great with veggies or on a sandwich or wrap. I'm still trying to get the hubby into embracing it, but right now he will at least occasionally eat it with chips. Not only is hummus super tasty, but it's also really a very healthy food- full of protein and fiber, and the olive oil adds a dose of healthy fat. Usually hummus calls for an ingredient called tahini, but because I have a hard time finding it around here, I just skip it. What I love about this recipe is it is simple, yet very versatile. You can adjust the seasonings depending on your taste. The recipe is easy to double, and it freezes beautifully. Here is the basic recipe I use:

Gather your ingredients. If you don't own a food processor, you could use a blender.

Throw all ingredients in the processor.

Pulse until smooth. Give it a taste and adjust seasonings as needed. If the flavor tastes a little strong, add a little more lemon juice which brightens it a tad.

Enjoy with a good whole grain tortilla chip or some veggies!
5-Minute Hummus
Makes about 6 servings (2 TBSP each)
1 can garbanzo beans, drained and rinsed
2 cloves garlic, peeled
1/4 c. olive oil
1 TBSP lemon juice-or a little more to taste
1 tsp. lemon zest
1/4 tsp. salt
3/4 tsp. cumin
dash of pepper
dash of paprika
In a food processor or blender, add all the ingredients and blend until smooth. Give it a little taste and adjust seasonings and lemon juice as needed. Refrigerate in an airtight container for 3 days or freeze.
Thursday, February 27, 2014
Easy Beef Casserole

This beef casserole reminds me of home. I remember my mom making this often when I was a child, and it was always delicious and comforting. It's easy, filling, and pretty healthy. I know your family will love it!

Brown meat in a large skillet or even better, a stockpot-mine ended up overflowing the skillet once I added the other ingredients. I used 1 lb. lean ground beef and 1 lb. lean ground turkey. Drain excess liquid.

Meanwhile, chop an onion, green pepper, and two celery stalks.

Get your other ingredients ready.

Toss the veggies, tomatoes, cream of mushroom, and water chesnuts into the pan. Cook on low for about 10 minutes. Meanwhile boil about 3/4 bag of whole wheat egg noodles-I slightly under cook the noodles as they will continue to cook in the oven.

As you can see in the picture above, my pan was about to overflow so I dumped everything in one of my large pots. Add the cooked egg noodles slowly until you get a nice noodle to beef mixture ratio. Give it a taste test and season as needed. I added a little extra salt and pepper. My hubby added hot sauce to his later.

Pour the casserole into a 9x13 pan and cover with 2 C. shredded cheddar cheese. I was preparing these as a freezer meal (instructions below), so I lined two 9x9 pans with foil before filling.

At this point I froze the casseroles, but you would normally put into a 350 oven for about 30-40 minutes or until hot and bubbly.
Enjoy!

Easy Beef Casserole
Serves 6-8
2 lb. ground beef (could sub half or all with ground turkey)
1 chopped yellow onion
1 large green pepper chopped
1/2 C. chopped celery (about 2 stalks)
16 oz. can diced tomatoes, no salt added
1 can sliced water chesnuts
1 can cream of mushroom soup (healthy request)
3/4 bag whole wheat egg noodles, slightly undercooked
2 C. shredded sharp cheddar cheese
Salt and Pepper to taste
Brown meat in a large skillet or stockpot and drain. Add next 6 ingredients to the meat and cook on low, stirring often for about 10 minutes. Meanwhile, boil the noodles according to package but slightly undercooked-they will finish cooking in the oven. Slowly add the noodles to the meat mixture until you get a noodle-beef ratio that suits you. Take a quick taste to see if you need a little more salt and pepper. Adjust seasonings as needed. Pour in a 9x13 casserole dish and top with shredded cheese. Bake at 350 for about 30-40 minutes or until hot and bubbly.
*This is a great freezer meal. I split it in half to make 2 9x9 dishes. Wrap each baking pan in aluminum foil, leaving excess on the edges for wrapping. Spray the bottom of the pans lightly with oil. Add casserole ingredients and top with cheese. Wrap the casserole up and refrigerate in the pan until cool. Then transfer to the freezer still in the pan. Once frozen completely lift the casserole out of the pan and transfer to a large freezer bag. When you are ready to use, pop the casserole back into the same pan you used to freeze it in. You can either thaw in your refrigerator 24 hours before cooking, or cook from frozen and add about 30 minutes to the cooking time.
Saturday, January 11, 2014
The Best Chocolate Chip Cookies EVER

My husband's favorite dessert of all time is a good chocolate chip cookie. "Love" would be an understatement for how much he enjoys them. So every now and then-probably more often than we need- I whip up a batch just for him. I will admit that most of the time I reach for the good ole' Betty Crocker pouch, but on special occasions I make this divine recipe. The recipe came from a friend of Tanner's years back named Tristan. To our family these have always been called "Tristan Cookies"; however, since you more-than-likely don't know Tristan, I figured I would title these "The Best Chocolate Chip Cookies Ever". To us, that is what they are, and I believe you will think so too! I normally try to put a healthier spin on recipes but NOT this one. It's definitely a diet splurge but oh so worth it! Plus it makes a ton of cookies, so I like to freeze some for later. Hope you enjoy!

In a very large bowl soften 4 sticks of butter(Yes I said it-4 Sticks!) in the microwave for a few seconds.

Add 1 1/2 c. sugar and 2 c. brown sugar and cream until smooth.
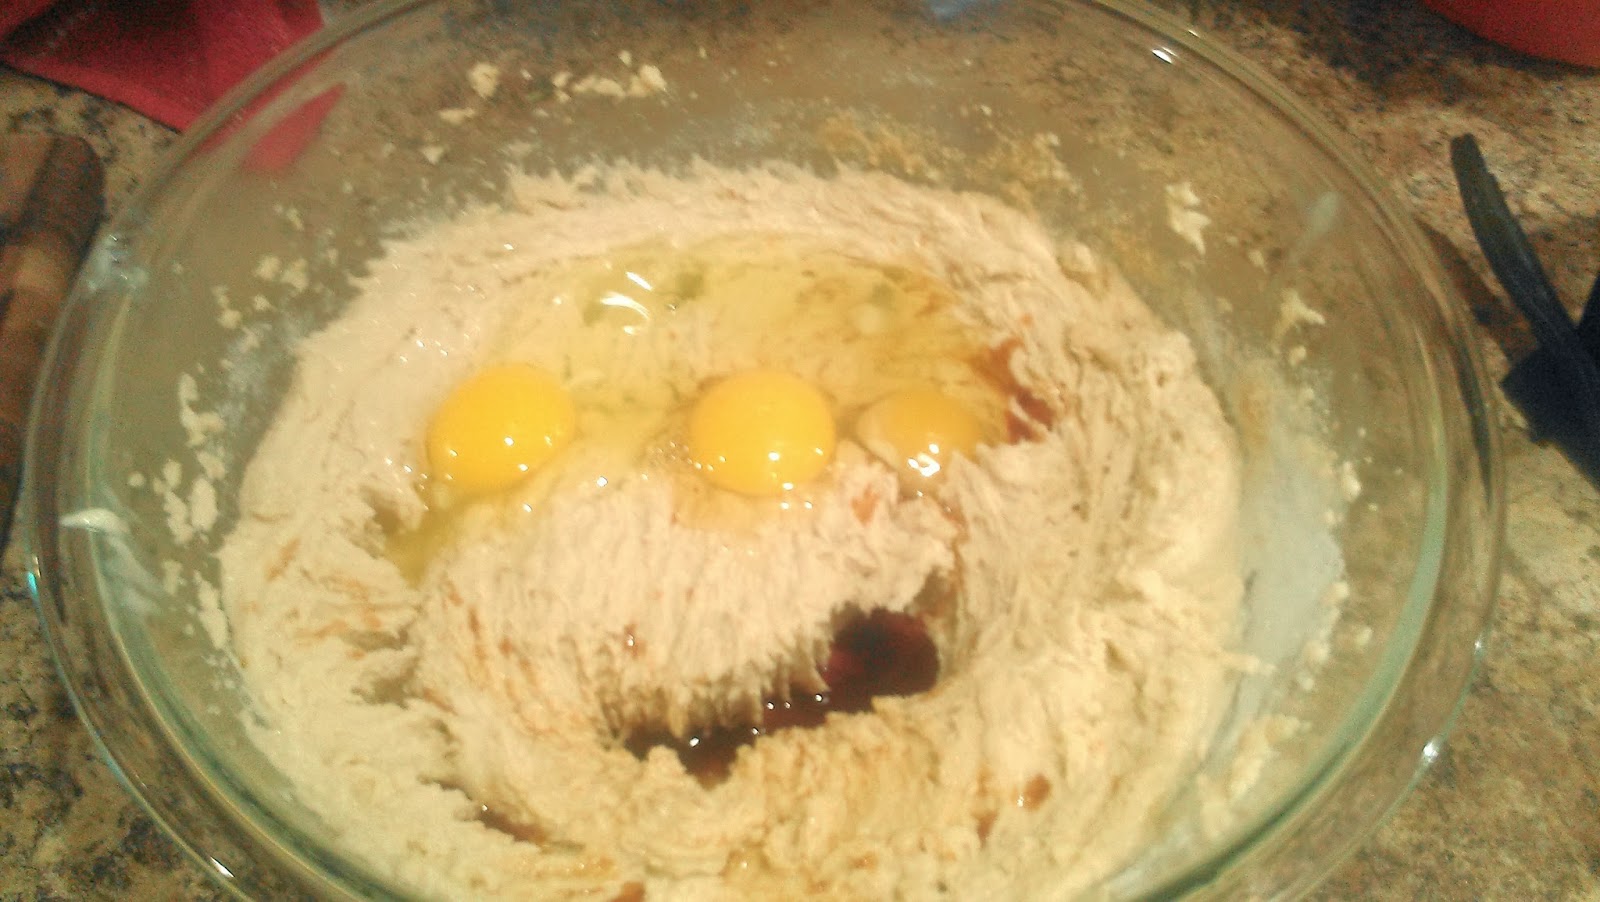
Add 2 TBSP vanilla and 3 eggs and beat until smooth.

Mix in 1/2 tsp salt and 1 1/2 tsp. baking soda. Then add 6 cups of flour, one cup at a time. It got too think for my mixer after about the 4th cup, so I switched to a spoon.

Add 4 cups of chocolate chips. I recommend using semi-sweet, as these cookies are pretty rich as is.

Place a big scoop of cookie dough on parchment-line cookie sheet. I use a medium-sized cookie scoop, but you could also use a small ice cream scoop. Press down on the cookie slightly.

Bake at 350 for 12-13 minutes. The edges will look lightly brown and the center will look not quite done yet. I always tend to over-bake cookies so this step is hard for me. But trust me-take them out when they look a little under-done. Let the cookies cool on the pan for 5-10 minutes. Then transfer to a wire rack to finish cooling. Enjoy!!
Best Ever Chocolate Chip Cookies
Makes about 4 dozen cookies
4 sticks unsalted butter, very soft
1 1/2 C. white sugar
2 C. lightly packed brown sugar
2 TBSP Vanilla
3 large eggs
1/2 tsp. salt
1 1/2 tsp. baking soda
6 C. flour
4 C. chocolate chips (I used semi-sweet)
In a very large bowl cream together the butter and sugars. Then add vanilla and eggs and mix until smooth. Next, add the salt and baking soda and mix. Then add the flour 1 cup at a time until blended. I used my hand mixer for the first 4 cups, and then as it got thicker I used a wooden spoon. The batter will be thick but still soft to the touch. Once all the flour is combined, add the chocolate chips. Line a cookie sheet with parchment paper. Using a small ice cream scoop or medium cookie scoop, put a good-sized dough ball on the paper. Press down just slightly. Make sure you don't over-crowd the pan, as they will spread out a little as they cook. Bake at 350 for 12-13 minutes. They will be just lightly brown on the edges, but will look not quite done in the middle. Let cool on the pan for 5-10 minutes. Then transfer to a cooling rack until completely cool. Store in an airtight container or ziploc. These freeze well also!
Thursday, April 4, 2013
Ham & Turkey Tasties

We could eat these little sandwiches every day, and some weeks we do! They are really easy to make and can be enjoyed either hot or cold. It's a recipe I got from my mother-in-law who also makes them quite frequently. I tweaked the recipe slightly by cutting back a bit on the butter and cheese. They freeze beautifully and travel well. We have these a lot on the boat in the summer, and they are perfect for packing lunches. They really are just the perfect little sandwich! I hope you try these today, because they are DELICIOUS! Okay let's get started!

1. Take the Hawaiian rolls out of the package and slice horizontally.

2. Separate the top and bottom.

3. In a small bowl mix softened butter, Worcestershire sauce, dijon mustard, onion powder, and poppy seeds. Spread evenly on both sides of bread.

4. Layer the ham slices on the bottom.


7. Place the top of the bread back on.

8. Cut out each roll. Either wrap in foil and heat until cheese is melty, serve cold, or wrap and freeze. Enjoy!

Makes 12 rolls
1 package King's Hawaiian Rolls (I use the honey wheat ones)
5 TBSP softened butter
1 tsp. mayo
1 teaspoon dijon mustard
1/2 tsp. worcestershire sauce
1 tsp. onion powder(or fresh grated onion)
1 tsp. poppy seeds
1/3 lb. thinly sliced deli ham(I usually get a smokehouse style ham)
1/3 lb. thinly sliced deli turkey (I usually get honey or oven-roasted style)
6 slices Provolone Cheese
Split the rolls in half lengthwise. In a small bowl mix butter, mayo, dijon mustard, worcestershire sauce, onion powder, and poppy seeds. Spread evenly on both sides of rolls. Layer on the bottom half ham, turkey, then cheese. Cover with top halves of rolls. At this point you can either wrap in foil and bake at 350 for about 20 minutes, store in the refrigerator as cold sandwiches, or wrap and freeze.
Sunday, March 24, 2013
Stuffed Pepper Casserole

Stuffed peppers are something I have loved since I was a child. My grandmother made them often, and thankfully her recipe has been passed on to me (will have to post her recipe sometime). I have made hers before and they are fantastic, but they are not the easiest dish to make. Lots of steps and lots of ingredients. When I found this stuffed pepper casserole recipe on Pinterest, I knew I had to give it a try in hopes of getting that same flavor but with an easier process. My husband and I were both impressed and ate every bit of it-even the left overs! It was adapted from a Kraft recipe and then I adapted again...so it's a twice adapted Kraft recipe! Hope you give it a try and feel free to adapt it to your family's liking.

1. Cook brown rice. You need 2 cups cooked, so I think I used about 2/3 c. uncooked.

2. Dice up a large green pepper, small onion, and mince 2 cloves garlic. Set those aside for a minute, while you brown your beef.


4. Once the pepper and onion start to become slightly tender, add in 1 shredded carrot and your minced garlic. Cook stirring for about 2 more minutes.

5. In a casserole dish, combine your 2 c. rice and beef mixture.

6. Add in a 24 oz jar of spaghetti sauce. Stir 1 can of sliced water chesnuts(cut in half), onion powder, and salt, pepper and red pepper flakes to taste.

7. Stir in about 1/2 c. mozzarella cheese and sprinkle the last 1 c. cheese on top. Bake at 350 for 30 minutes until bubbly and cheese begins to brown.
Stuffed Pepper Casserole
Serves 6-8
2 cups cooked brown rice
1 lb. lean ground beef
1 large green pepper, diced
1 small onion
1 carrot, shredded
1 can sliced water chesnuts, cut in half
2 cloves garlic, minced
1 24oz. jar spaghetti sauce(italian seasoned-if using plain you may need to add a few more spices)
1 tsp. onion powder
salt and pepper to taste
1 1/2 c. mozzarella cheese, divided
Cook the rice in a pot. Meanwhile, dice up the green pepper and onion, mince the garlic, shred the carrot, and cut the water chesnuts in half. In a skillet, brown the ground beef. Once its almost cooked through, add in the onion and green pepper. Cook for a couple minutes until slightly tender. Next add in the carrot and garlic and cook stirring for a couple more minutes. In a large casserole dish pour the beef mixture, rice, water chesnuts, and spaghetti sauce. Mix it up and give it a taste test. Season to your taste using salt, pepper, onion powder, and red pepper flakes. Stir in 1/2 c. mozzarella cheese and sprinkle the other 1 c. on top. Bake at 350 for 30 minutes or until hot and bubbly.
Wednesday, March 6, 2013
Apple Carrot Molasses Muffins

I found these little muffins on pinterest at http://catesworldkitchen.com/2010/02/molasses-muffins/. I brought them to school for the 4th grade team and they were a big hit! They are so moist and just the right amount of sweetness. For being so delicious, it's hard to believe they are so healthy. Even the hubby loved them which was a big surprise! I really encourage you to try them. They would be perfect to make on a Sunday night to eat throughout the week for breakfast.

1. Add all your dry ingredients together in a bowl.

2. Grate one large carrot and 1 apple.

3. Mix all your wet ingredients together, including carrot and apple.

4. Slowly mix your dry ingredients into the wet. Add the chopped walnuts.

5. Fill your muffin pan. I used a mini muffin pan. Bake at 350 until toothpick comes out clean.

Apple Carrot Molasses Muffins
1.5 cups white whole wheat flour
1 tsp. baking powder
1 tsp. baking soda
1/4 tsp. salt
1 1/2 tsp. cinnamon
1 tsp. ginger
1/4 tsp. nutmeg
2 eggs
2/3 c. molasses
1 apple peeled and grated (I used a gala apple)
1 large carrot grated
1/2 c. walnuts chopped
1/4 c. oil (I used coconut oil)
Mix dry ingredients together in a bowl. Grate your carrot and apple. Mix wet ingredients along with the carrot and apple. Add dry ingredients to wet and add your nuts. Bake at 350 in either regular or mini muffin tin until toothpick comes out clean. Makes about 14 regular muffins or about 30 mini muffins.
Subscribe to:
Posts (Atom)